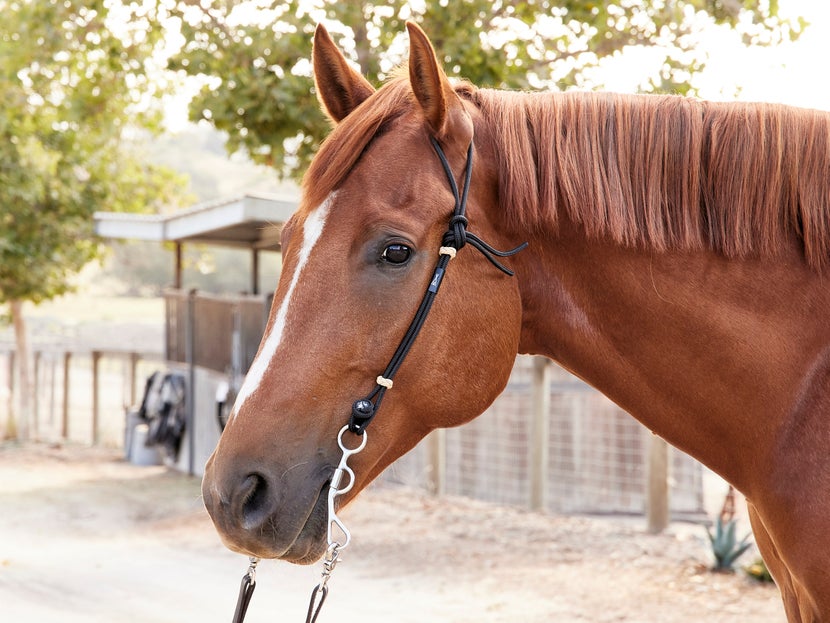
How to Make a Horse Headstall: The Crafting Guide
Share
As a **health-conscious pet owner**, you may find yourself seeking ways to create quality gear for your beloved horses. One essential piece of equipment is the headstall, a crucial component of the bridle, providing control and communication between the rider and the horse. In this article, we will delve into how to make a horse headstall, ensuring it is comfortable and safe for your equine friend.
Before embarking on this creative journey, its vital to understand that a well-made headstall not only ensures proper functionality but also contributes to the overall health and comfort of your horse. Thus, knowing how to make a horse headstall can empower you to prioritize your pets needs while enjoying the crafting process.

Understanding the Importance of a Headstall
The headstall serves as a bridge between horse and rider. It holds the bit in position, enabling the rider to direct the horse effectively. For more insights about headstalls, you can check out this headstall guide.
Given its significance, selecting the right materials and ensuring proper fit are fundamental to crafting a quality headstall. A poorly fitted headstall can cause discomfort, leading to tension and other issues for your horse. This article will guide you through the steps to create a headstall that meets both functionality and comfort.

Materials Needed for Crafting a Headstall
Before we dive into the making process, gather the necessary materials:
- Durable leather or nylon straps
- Stitching needles and heavy-duty thread
- Metal buckles and fittings
- Scissors
- Measuring tape
- Hole punch tool
- Leather conditioner
The choice of material is critical, with leather often being favored for its durability and comfort. However, high-quality nylon can also offer a lighter alternative.

Step-by-Step Guide on How to Make a Headstall
Lets break it down into simple steps for a smoother crafting experience:
Step 1: Measure Your Horse
Start by measuring the circumference of your horses head, keeping in mind various points such as the poll, noseband, and cheeks. Accurate measurements are crucial for ensuring a proper fit.
Step 2: Cut the Straps
Using your measurements, cut the leather or nylon straps into the required lengths. Its better to cut a little longer and adjust as needed. This is a key aspect of knowing how to make a horse headstall effectively.
Step 3: Create Holes for Buckles
Using the hole punch, create holes on the cut straps for the metal buckles. They should be evenly spaced to allow for necessary adjustments.
Step 4: Assemble the Headstall
Begin placing the straps in the desired configuration. Attach the buckles to the ends of the straps securely. Ensure each piece is aligned and fits approximately where it needs to go on your horse.
Step 5: Stitching and Reinforcement
With the headstall loosely assembled, its time to stitch everything together. Use a strong thread and needle for durability. At stress points, consider adding additional stitches for reinforcement.
Step 6: Conditioning the Leather
If using leather, applying a leather conditioner is crucial for both maintaining appearance and extending the life of the material.
Step 7: Test the Fit
Before using the headstall, try it on your horse. Make any final adjustments to ensure that it sits comfortably without pinching or rubbing.

Maintaining Your Horse Headstall
Regular maintenance is necessary to ensure durability. Consider the following tips:
- Clean the headstall using appropriate cleaners to remove sweat and grime.
- Condition leather regularly to prevent drying and cracking.
- Check for signs of wear and tear, replacing any faulty parts before they become a problem.
This care routine not only maintains the headstall itself but is also a fantastic way to secure your horse's health.
Benefits of a Homemade Headstall
Creating a headstall at home comes with numerous advantages:
- Customization: You can personalize the headstall to suit your horses specific measurements and style preferences.
- Cost-effective: Making it yourself may save you money compared to purchasing high-end options from retailers.
- Quality control: You know exactly what materials are used, ensuring nothing harmful compounds are involved.
Conclusion
Knowing how to make a horse headstall not only enhances your crafting skills but also deepens your bond with your horse by ensuring its comfort and safety. This project allows for creativity and practicality, fulfilling both your artistic side and your responsibilities as a health-conscious pet owner. Take on this crafting challenge and enjoy the process of creating gear that you know will benefit your equine friend.
Frequently Asked Questions
What materials are best for a headstall?
Durable leather or high-quality nylon are two of the best options for making a headstall.
How often should I clean my horse's headstall?
It is advisable to clean your headstall after every use to maintain its quality and cleanliness.
Can I customize the size of the headstall?
Absolutely! Customizing the headstall size based on your horse's measurements ensures it fits comfortably.
As an Amazon Associate, I earn from qualifying purchases.
